
Making homemade pierogi dough is easier than you think. After years of making pierogi, I've perfected this foolproof recipe that uses just 4 simple ingredients. The dough is soft, elastic, and incredibly easy to work with—no need to dust your work surface with flour because it doesn't stick! Best of all, it makes tender, melt-in-your-mouth pierogi every time.
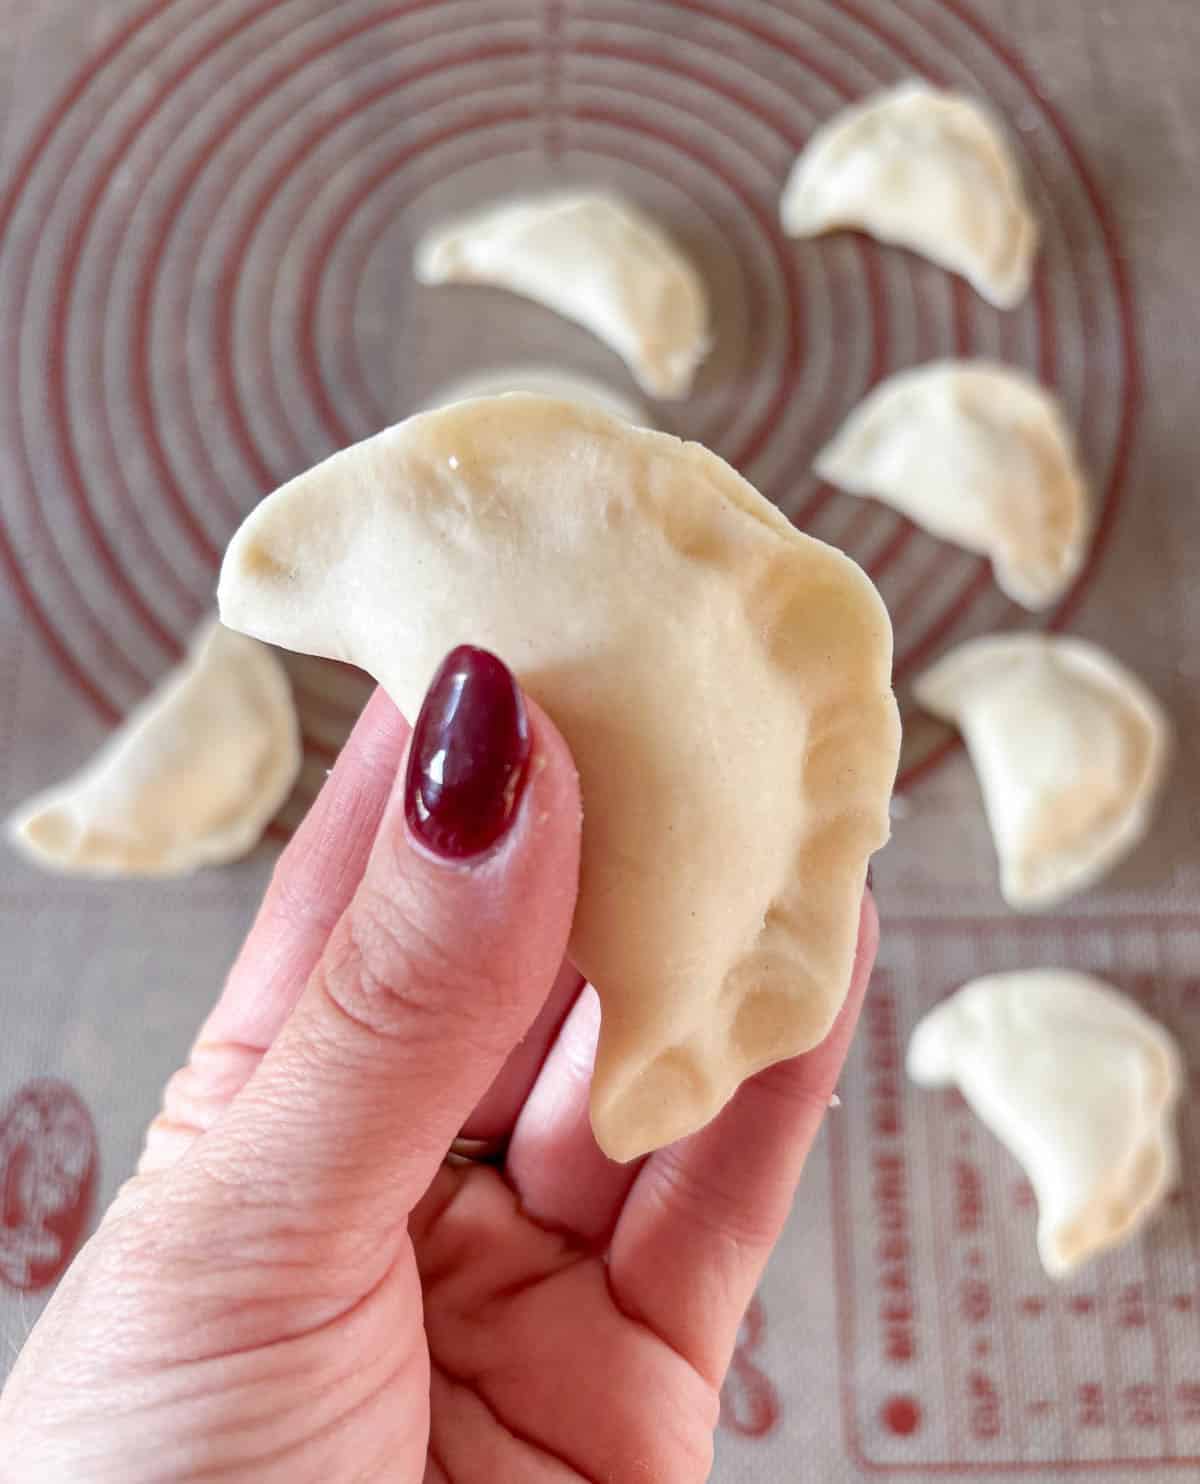
Growing up in Poland, homemade pierogi were always a part of my life. Like many traditional Polish recipes, including gołąbki (stuffed cabbage rolls), kotlet schabowy (breaded pork chops), and Polish chicken meatballs (klopsiki), pierogi are the kind of comfort food I grew up eating and still love making for my family.
And if there's one thing I've learned from years of making pierogi, it's that good pierogi start with good dough. This is the recipe I keep coming back to, whether I'm making a batch for a family dinner or preparing dozens of pierogi for the holidays.
Jump to:
- Ingredients
- How to make authentic Polish pierogi
- Tips for the Best Pierogi Dough
- Agnieszka's Top Tip
- Can I use a pasta roller attachment to roll out pierogi dough?
- Can I use a pierogi maker press?
- Why aren't my pierogi sealing properly?
- More pierogi dough FAQs
- More authentic Polish recipes
- Recipe
- You may also like
- Meet the Author
Ingredients
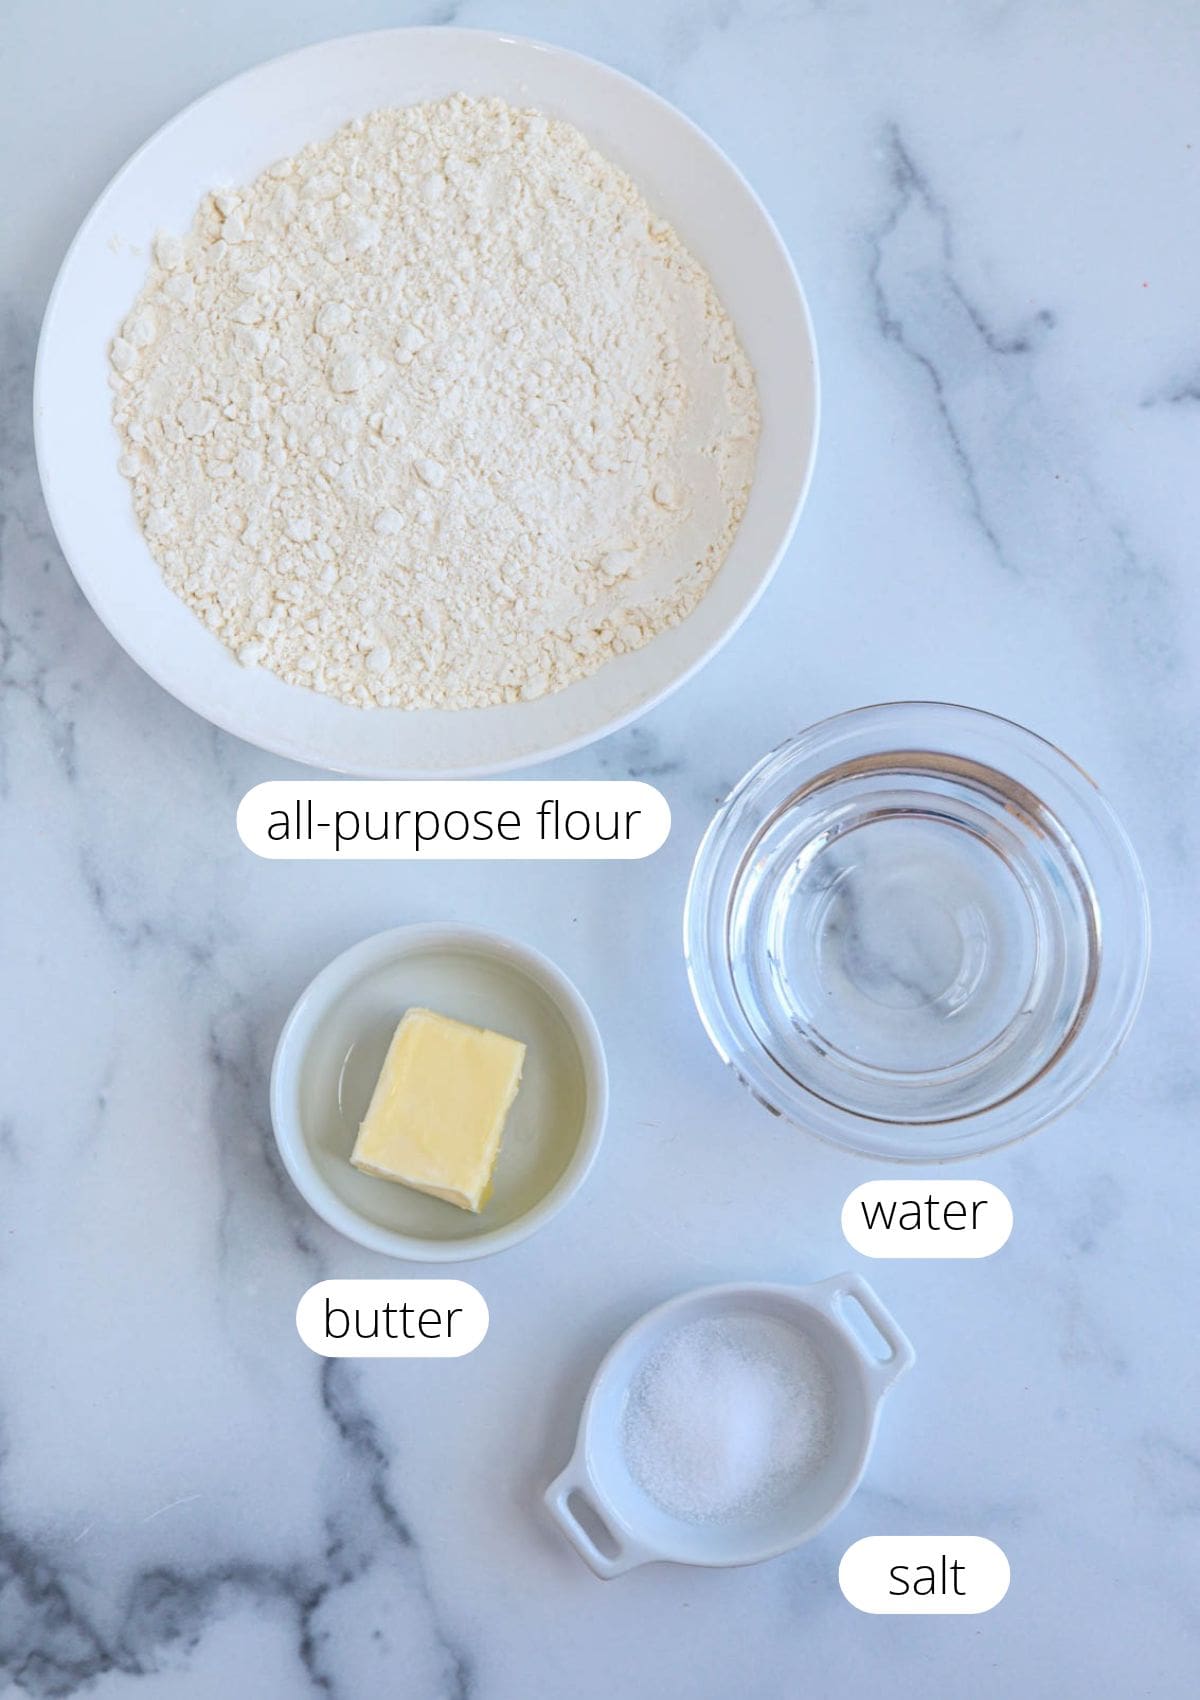
- All-purpose flour: Regular all-purpose flour works perfectly here. For the best results, use a kitchen scale (the amount you want is 250 grams).
- Salt: Just a little to give the dough some flavor.
- Butter: Melted butter helps keep the dough soft and tender. Some people add oil but I prefer butter.
- Boiling water: This is the secret to soft, elastic pierogi dough! Hot water partially gelatinizes the starch in the flour, making the dough easier to knead and roll out without tearing.
See recipe card for quantities.
How to make authentic Polish pierogi
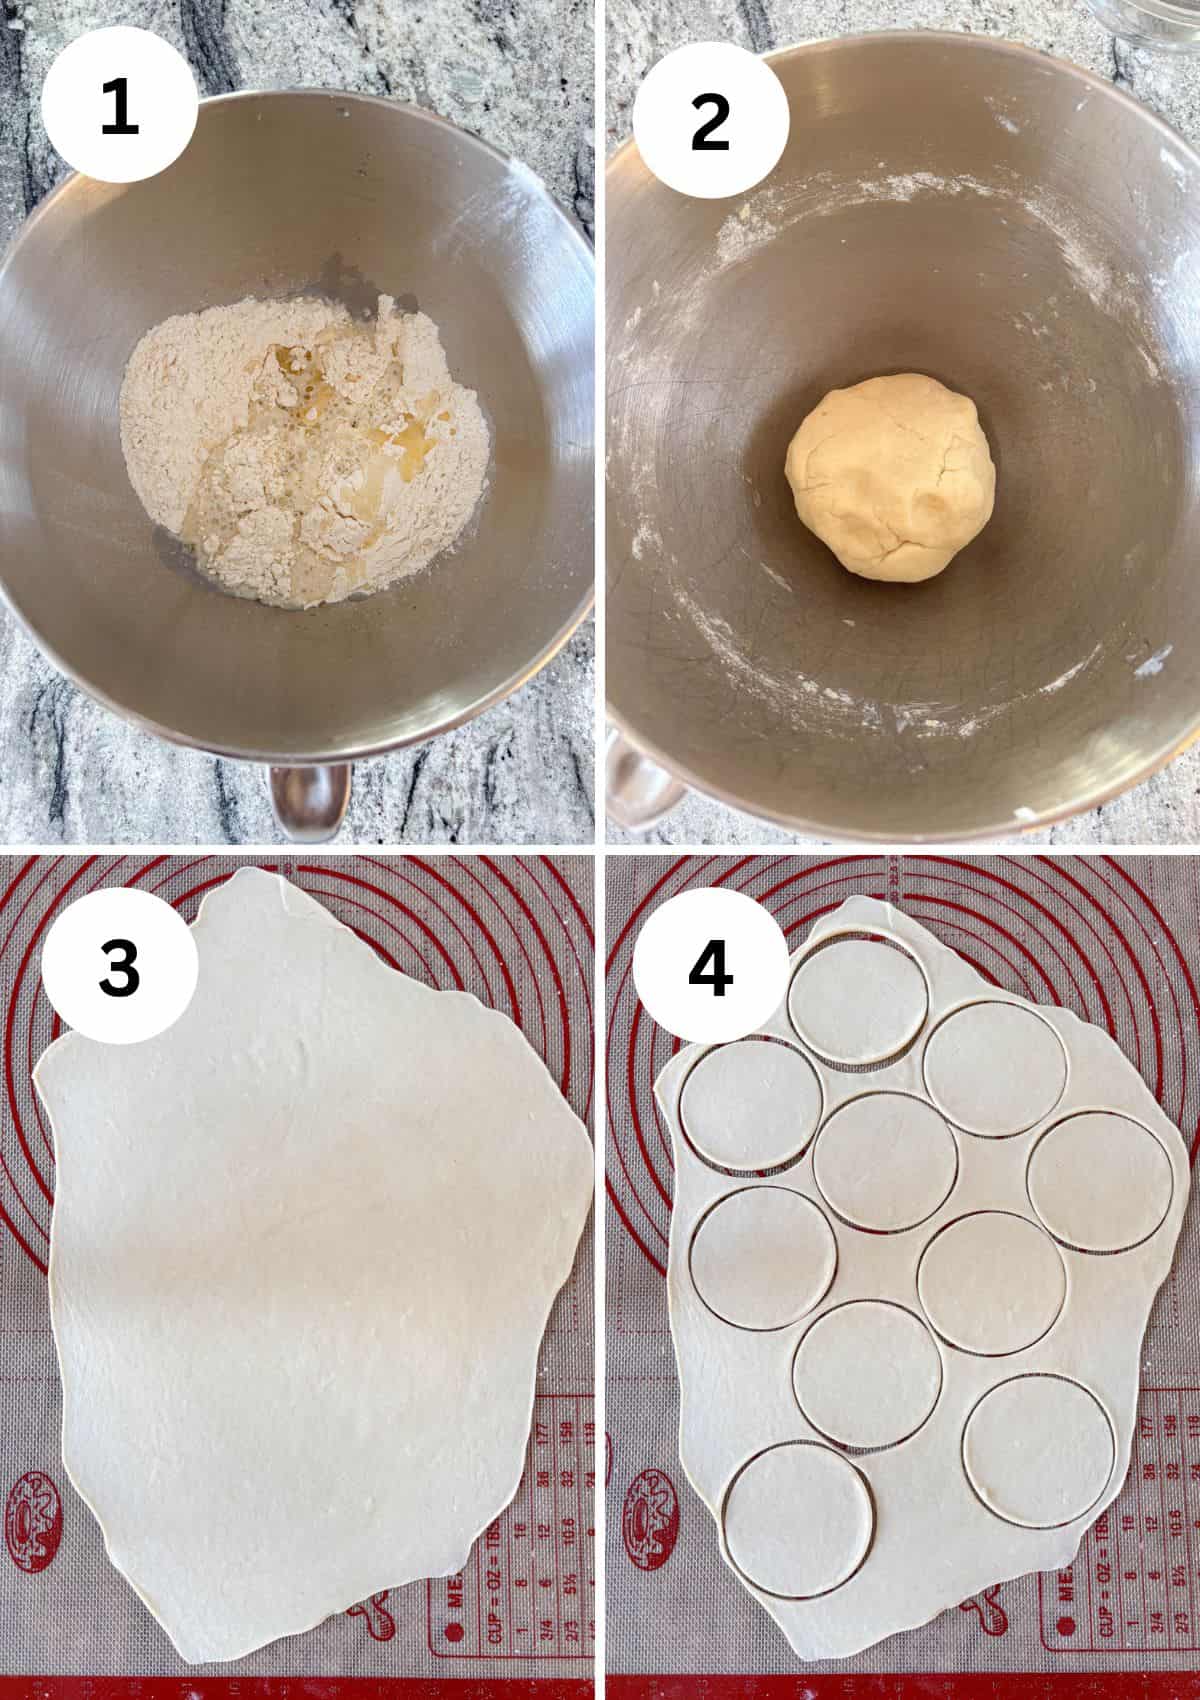
- STEP 1: Mix the ingredients. Add the flour, salt, melted butter, and boiling water to the bowl of a stand mixer (or in a large bowl if making by hand). Stir with a spoon until roughly combined. (Photo 1)
- STEP 2: Knead and rest the dough. Using the dough hook (or your hands), knead for about 5 minutes, until a smooth, soft, and elastic dough ball forms. If the dough seems too dry, add another 1–2 tablespoons of hot water. Cover tightly and let rest for 20–30 minutes. (Photo 2)
- STEP 3: Roll out the dough. Divide the dough in half, keeping one half covered. Roll the other half out to about ⅛ inch (3 mm) thick. You shouldn't need to flour your work surface, but you can lightly dust the rolling pin if it sticks. (Photo 3)
- STEP 4: Cut out circles. Using a round cookie cutter or the rim of a glass, cut out circles as close together as possible. Remove the scraps and add them to the remaining dough, keeping everything covered to prevent drying out. (Photo 4)
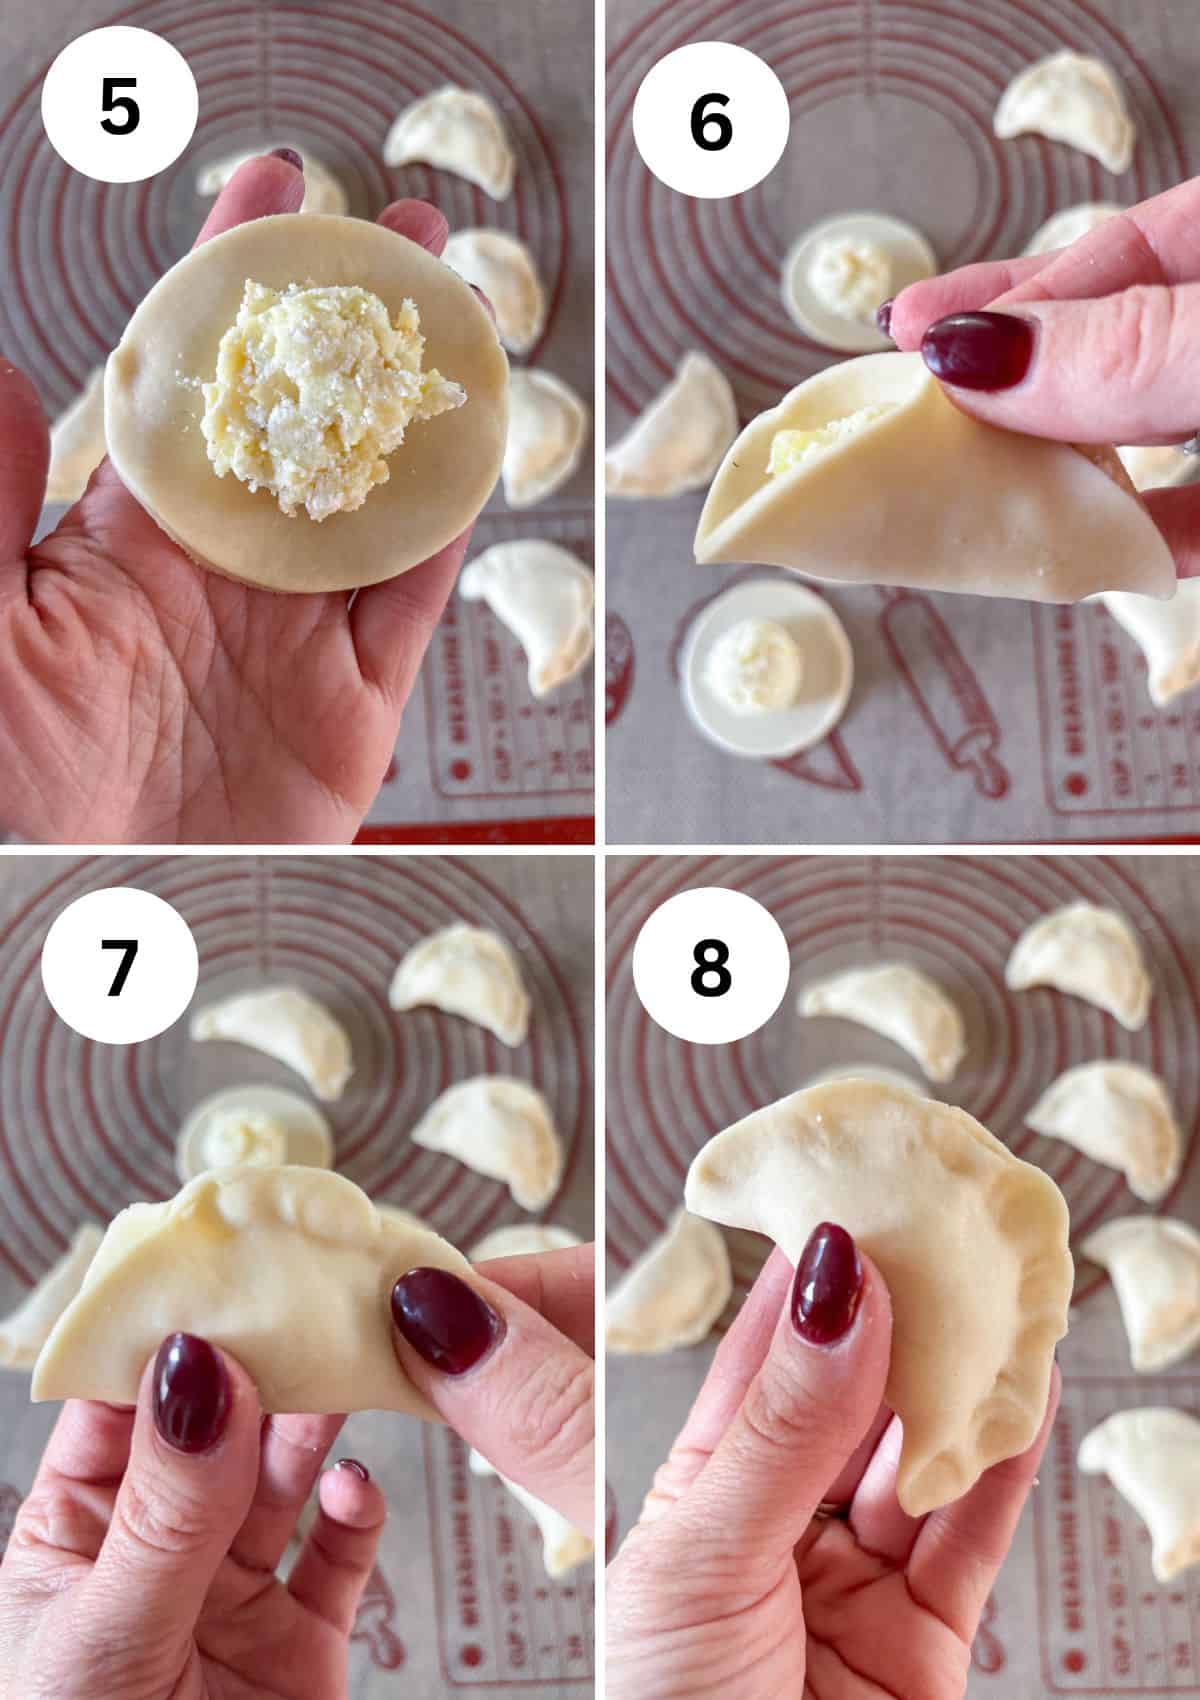
- Step 5: Add the filling. Place a spoonful of your favorite pierogi filling in the center of each dough circle. Be careful not to overfill. (Photo 5)
- Step 6: Fold the dough. Fold the circle in half over the filling to create a half-moon shape, making sure the edges line up. (Photo 6)
- Step 7: Seal the edges. Pinch the edges firmly together with your fingers, working from one end to the other. Make sure no filling gets caught between the edges. (Photo 7)
- Step 8: Finish shaping. For a decorative edge, gently pinch and fold the sealed edge to create a traditional crimped pattern. Repeat with the remaining dough and filling, keeping the finished pierogi covered until ready to cook. (Photo 8)
Now that your pierogi are shaped, they're ready to boil! For specific cooking instructions and filling ideas, check out my [Pierogi Ruskie Recipe].
Tips for the Best Pierogi Dough
A few simple tricks will help you get perfect pierogi dough every time.
- Don't overfill your pierogi. It's tempting to squeeze in as much filling as possible, but overfilled pierogi can make it difficult to close them and they may burst during cooking.
- Measure your flour correctly. Too much flour can make pierogi dough stiff and difficult to roll. I recommend using a kitchen scale whenever possible.
- Use hot water. Boiling water is key to making the dough soft and pliable. Just be sure to mix everything with a spoon before handling it with your hands.
- Adjust the water as needed. Depending on your flour, you may need an extra tablespoon or two of water. The dough should be soft and slightly sticky, not dry or crumbly.
- Don't skip the resting time. It makes a big difference! Resting allows the gluten to relax so the dough doesn't keep shrinking when you roll it.
- Keep the dough covered. Pierogi dough dries out quickly, so always cover any dough you're not actively working with.
- Use water to close pierogi if needed. If you're having a hard time closing the pierogi, wet your finger, run it along the inside edge and that should help it close.
Agnieszka's Top Tip
Avoid adding too much flour. This dough should be easy to handle without heavily flouring your work surface. Too much extra flour can make it tough and prevent the edges from sealing properly.
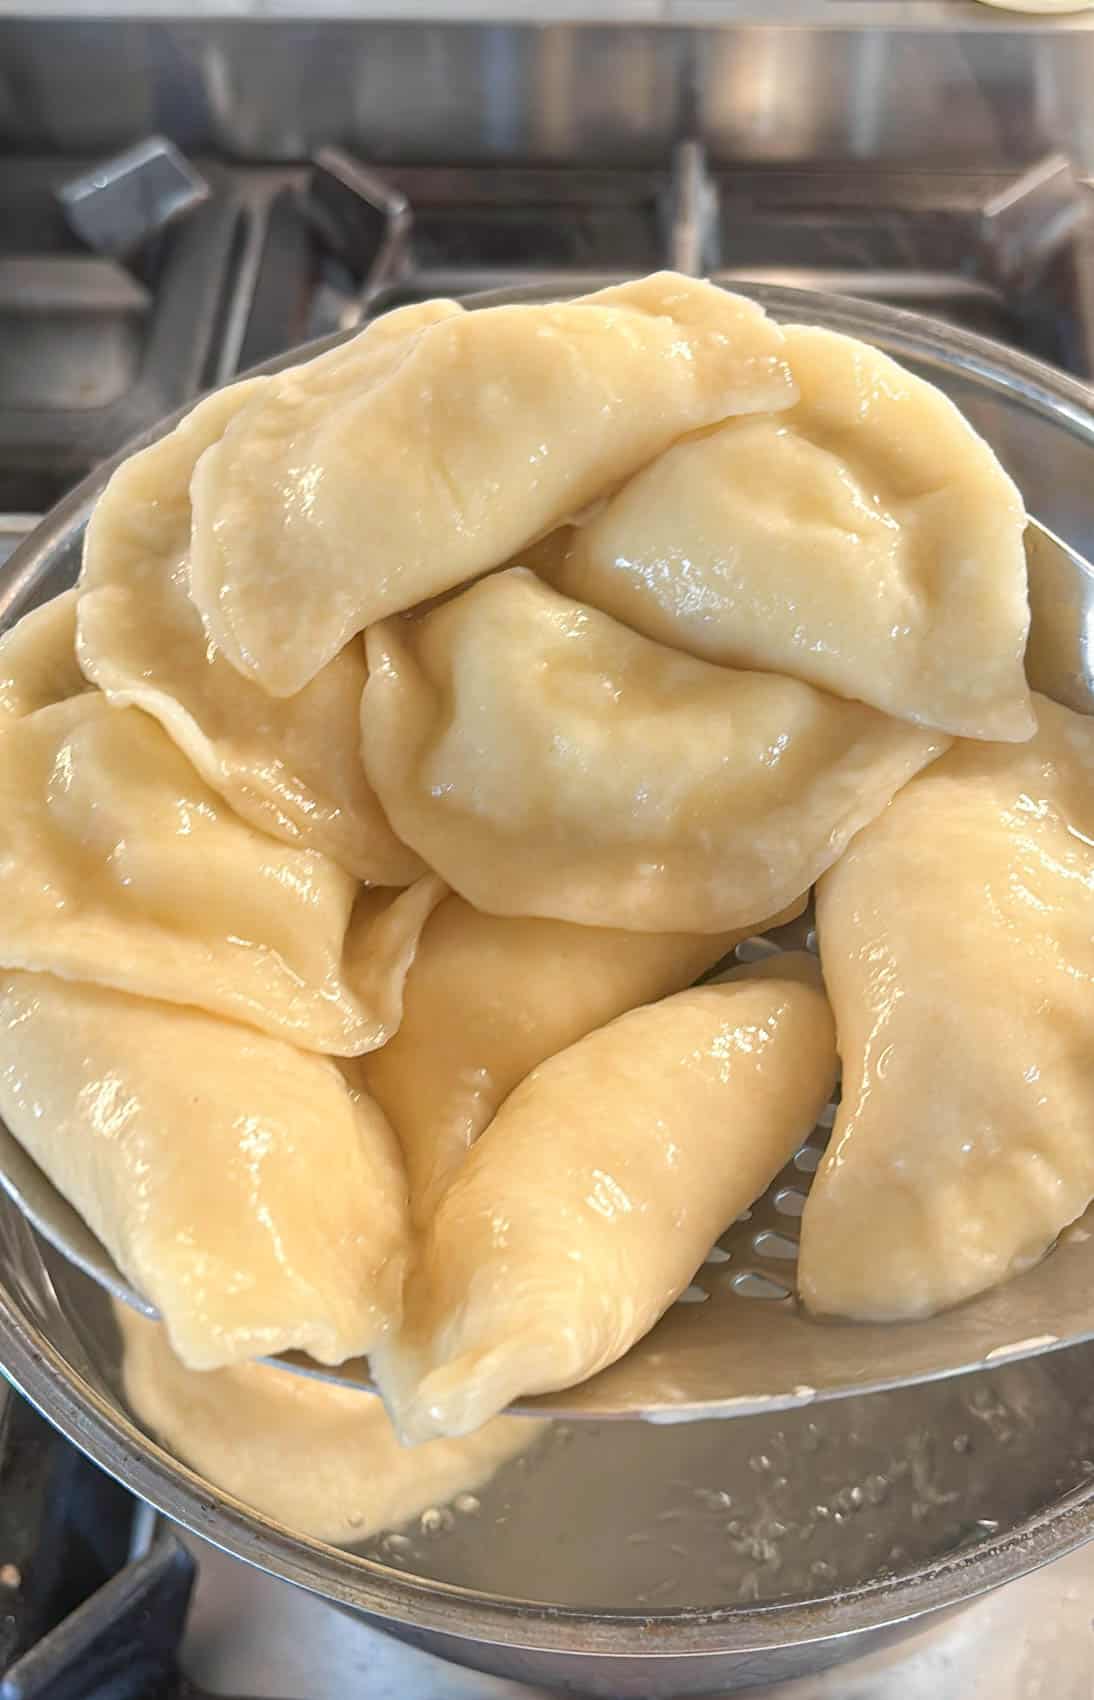
Can I use a pasta roller attachment to roll out pierogi dough?
Yes! If you have a KitchenAid stand mixer with a pasta maker attachment, you can absolutely use it to roll out your pierogi dough. I recommend setting the roller to 4 for the ideal thickness. It makes rolling the dough quick and easy, especially when making a large batch of pierogi.
Can I use a pierogi maker press?
I usually make my pierogi by hand but some cooks like to use a pierogi press. You can definitely give it a try but from my experience, they don't always work very well. If you find one that works and seals pierogi properly, let me know!
Why aren't my pierogi sealing properly?
This usually happens when the edges of the dough are too dry. Adding too much flour when rolling out the dough or letting the cut-out circles sit uncovered for too long can make it difficult to seal the pierogi. Keep the dough covered when you're not working with it, and avoid using extra flour unless absolutely necessary. If the edges are already dry, lightly moisten them with water before pinching them together.
More pierogi dough FAQs
No! While some traditional Polish pierogi dough recipes include eggs, they're not necessary. My recipe uses just flour, salt, butter, and hot water to create a soft, elastic dough that makes tender, melt-in-your-mouth pierogi.
Yes, you can freeze pierogi dough for up to 2 months if it's tightly wrapped. Thaw it overnight in the refrigerator, then let it come to room temperature before rolling. However, I recommend freezing assembled, uncooked pierogi instead. It's more convenient, and you can cook them straight from frozen!
Yes! You can make the dough up to 24 hours ahead and store it tightly wrapped in the refrigerator. Let it sit at room temperature for about 30 minutes before rolling it out so it's easier to work with.
Pierogi dough should be soft and slightly sticky, but it shouldn't stick to your hands or work surface. If it's too sticky, let it rest for a few minutes before adding more flour. If needed, add a little flour at a time until the dough is easier to handle.
More authentic Polish recipes
Looking for other recipes like this? Try these:



Recipe
Foolproof Pierogi Dough (Polish Recipe)
Equipment
- 1 standup mixer or just a bowl if making by hand
- 1 round cookie cutter or a large glass
Ingredients
- 2 cups all purpose flour spooned and leveled (250 grams)
- ½ teaspoon salt
- 3 tablespoon butter melted
- ½ cup boiling hot water (110-125 ml) see Notes
Instructions
- Standup mixer method: Add the flour, salt, melted butter, and ½ cup of boiling water to the bowl of a stand mixer. Stir with a spoon until roughly combined, then knead with the dough hook for about 5 minutes, or until a smooth dough ball forms. The dough should be soft, elastic, and slightly sticky. If it seems too dry, add another 1-2 tablespoon of boiling hot water.
- By Hand Method: Add the flour and salt to a large mixing bowl. Pour in the melted butter and ½ cup of boiling water. Stir with a spoon until roughly combined and cool enough to handle. Transfer the dough to a lightly floured surface and knead by hand for about 8–10 minutes, or until a smooth dough ball forms.
- Place the dough in a bowl and cover tightly with a lid or plastic wrap. Set aside for 20-30 minutes.
- Cut the dough in half (keep the other half covered) and roll it out on a clean surface to ⅛ inch thick (about 3mm). I use a silicone mat for rolling the dough. If the rolling pin sticks to the dough, flour it lightly. Avoid adding flour - the dough should be easy to handle and not stick to the surface.
- Using a round cookie cutter or a large spoon, cut out circles close to each other. Immediately remove any leftover dough and add it to the remaining dough. Keep it covered to avoid drying out.
- Add filling in the center of each dough circle. Fold each circle in half over the filling and pinch the edges to form pierogi.
- Repeat with remaining dough until you use it all up.
Notes
- Yield: This recipe makes approximately 25–30 pierogi, depending on the size of your cutter.
- Measure flour correctly: For best results, use a kitchen scale (you want 250 grams) or spoon and level the flour. Too much flour can make the dough tough.
- Adjust the water: If the dough feels dry or crumbly, add another 1–2 tablespoons of hot water. It should be soft, elastic, and slightly sticky.
- Don't skip resting: Let the dough rest for 20–30 minutes to make it easier to roll out.
- Avoid extra flour: The dough shouldn't stick to your work surface. Lightly flour the rolling pin only if needed.
- Keep it covered: Cover any dough you're not working with to prevent it from drying out. Dry dough can be difficult to seal.
- Pasta roller option: If using a KitchenAid pasta roller attachment, roll the dough to setting 4.
You may also like



Meet the Author
Hi, I'm Agnieszka. I'm a mom of three and recipe developer, writer and photographer behind Wholly Tasteful. I love creating comforting, delicious, family-friendly recipes that you can feel good about.
Leave a Comment